

04
Jul
How to make simple iPhone & android Games (cross platform) with Gideros Mobile
- Category:
- iPhone iOS

Posted On : July 4, 2013
| No Comment
What is Gideros Studio
Gideros Studio is a cross platform development tool created by Gideros Mobile as of now it supports iPhone, iPad, iPod and all Android Devices. It uses LUA as a programming language very lightweight and powerful. Gideros studio will out put you native code for ios and android devices as xcode and android project. In the future it will also going to support Windows phone as well as mac and pc.
Download and Installation
This is really very straight forward process and I really don’t want to write stuff like go here, download this , double click on so and so file etc so I am leaving this up to you. Go to the site giderosmobile.com/download register your self as a developer, download the latest version and install that once you had installed this come back here we are not going anywhere and waiting for you.
First Program
As all of we know that it is a tradition in the it industry to write Hello World program whenever we want to learn any new technology and I don’t want to break this tradition so we will write Hello World for now how ever our actual tutorial is much harder then Hello world so cross your fingers.
I am assuming that you had downloaded latest version of Gideros Mobile so most complicated part is finished now open the Gideros Studio and create new project as shown in the screenshot below

Name the project as HelloWorld and save it at suitable location. Now right click on the HelloWorld project as shown in the screenshot below

Name the file as main.lua strictly main.lua name as it is the first file which is going to run in lua just like main() is the first function to run in C or C++
Now open this main.lua file and write
print("Hello World")
Now start the player (player —> start local player) and then switch back to Gideros Studio and run project (player —> start) now you should see somewhat similar out put as screenshot below

See the out put window for output as so far we have not done anything to display in the player. Now switch back to player and go to hardware —> resolution and you can see most of the resolution which are needed for the ios and android development as shown in below screenshot

You can switch to any resolution and see how your game will look in that device. Now switch back again to Gideros Studio and right click on the project HelloWorld and click on the properties and set project properties as below screen shot.

and then write below code in main.lua and hit run
local myText = TextField.new(nil,"Hello World") ;
myText:setPosition(160-myText:getWidth()*0.5,240-myText:getHeight()*0.5) ;
stage:addChild(myText);
now you can see some text in the player the code is really self explainable we had passed nil because we are not using any font for this in the case you have any ttf file add that to the project by right click on project —> add existing file —> go to the your file and select that.
Note :- as Gideros is allowing to add reference of any file to the project I still recommend to to first copy that file in our project directory manually and then use that file to avoid any confusion in the future.
Now as you had added ttf file we need to create font from that file to do this write below code in main.lua
local myFont = TTFont.new("SNAP____.TTF",32);
local myText = TextField.new(myFont,"Hello World");
myText:setPosition(160-myText:getWidth()*0.5,240-myText:getHeight()*0.5);
stage:addChild(myText);
Again the code is self-explainable we had just created font of the size of 32 and then used that to create our text. Now you can also play with different resolution provided in the player and different scale mode from project properties of the Gideros Mobile. Every time when you change the resolution in the player or scale mode in properties you also need to launch the project from Gideros Studio to see the effect. Take some time to play with this and understand how game will look in different resolution and come back once you finished so we can start our actual tutorial. Now probably you should trust us that we are not going anywhere and waiting for you.
Actual Tutorial
So finally after basic HelloWorld program now we can start our actual tutorial but before we start let see what you had learn from playing with different resolution and scale modes. See I am a strict teacher if you don’t have done your home work go back and do now else just remember this for now “In Gideros Studio (0,0) point is top left corner with x increased from left to right and y increases from top to bottom”
Now we start our actual tutorial and for that we need some graphics obviously it is not possible to make game without graphics at least in my opinion. So download them from here . this entire graphics are made by Vicki wenderlich wife of Ray wenderlich all of we know them right? Hardly there would be any ios developer living in this world who don’t know Ray and yes we are going to convert his one of the tutorial from cocos2d to Gideros Mobile it would be much good for all cocos2d developer as well as for new comers as this tutorial is very good for learning purpose.
Now add all the downloaded files in to the project (right click on project —> add existing file —> go to the your file(s) and select that just in the case you forgot)
Also go to the project property and set orientation to landscape do the same for player also. set the scale mode to letterBox and logical dimension to 320 and 480. Now paste the below code in main.lua also there is no need of the helloworld project so either replace all the codes or create new project as you wish.
local player=Bitmap.new(Texture.new("player.png"))
player:setAnchorPoint(0.5,0.5)
player:setPosition(player:getWidth()*0.5,160)
stage:addChild(player)
after this you should see the out put like below if not you had missed something try to find and correct that.
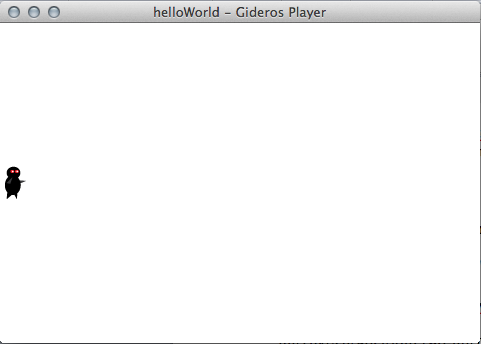
Pretty good so far right? Yeah but now try other resolution and you will see that in other resolution especially in android our player is not at the left part. This is the biggest problem in android unlike ios android has no standard in resolution and there are plenty of resolution available in android so we need some additional setting to handle android device. To do so paste below to line at the top of all our code
local dx = application:getLogicalTranslateX() / application:getLogicalScaleX()
local dy = application:getLogicalTranslateY() / application:getLogicalScaleY()
local screenWidth = application:getContentWidth()
local screenHeight = application:getContentHeight()
and change the player position code as below
player:setPosition(-dx+player:getWidth()*0.5,160)
now try any resolution and our player will always at the left side of the screen. It is a good practice to go in this way however for now sake of simplicity or you just want to target ios and if you want to ignore this you can. Very good now we need to add some monster at the right hand side and they will come from right to left. To do so add below code in main.lua at the end of all our code.
local monster = Bitmap.new(Texture.new("monster.png"))
monster.name = "monster"
monster:setAnchorPoint(0.5,0.5)
local yPos = math.random(-dy+monster:getHeight()*0.5,screenHeight+dy-monster:getHeight()*0.5)
local xPos = dx+screenWidth+monster:getWidth()*0.5monster:setPosition(xPos,yPos)
stage:addChild(monster)
What we have done in above code is initiate our monster at the right side of the screen as well as given it a name so we can identify it in the future 2and as it is just outside of the screen we can not see it. The calculation of determining yPos is little difficult but still much easy to understand give some time to understand all maths in that.
Now we need to decide what we need to do. ok we will create 10 monster and all of them will come from right to left at different speed. To do so modify the code of monster creation as below
timer = Timer.new(1000, 10)
function onTimer(e)
local monster = Bitmap.new(Texture.new(“monster.png”))
monster.name = “monster”
monster:setAnchorPoint(0.5,0.5)
local yPos = math.random(-dy+monster:getHeight()*0.5,screenHeight+dy-monster:getHeight()*0.5)
local xPos = dx+screenWidth+monster:getWidth()*0.5
monster:setPosition(xPos,yPos)
stage:addChild(monster)
end
function onTimerComplete(e)
print(“all monster have been passed”)
end
timer:addEventListener(Event.TIMER, onTimer)
timer:addEventListener(Event.TIMER_COMPLETE, onTimerComplete)
timer:start()
You might have noticed that in some code I am putting “;” at the end and in some code I am not putting it yeah that’s the good thing about lua it is optional.
Ok what we have done in above code is created one timer and calling that 10 times at the delay of 1 sec provided as 1000 milliseconds. However still all of the created monsters are outside of the screen so we cant see them however I can bet you had changed the xpos and seen all the monster see I can read your mind if you had not done that change the xpos of monster to any value and see how monsters are creating after some delay.
Now moving stuff finally we had waited so long for this monster need to move from right to left.
Before we move our monster lets download this project
https://github.com/gideros/GTween extract that project and add two files named gtween.lua and easing.lua to our project we need them in order to move monster easily.
To do so add below code after the line
stage:addChild(monster)
local duration = math.random(2,4)
monster.myTween = GTween.new(monster,duration,{x = -dx-monster:getWidth()*0.5},{dispatchEvents = true})
monster.myTween:addEventListener(“complete”,
function()
stage:removeChild(monster)
monster = nil
end)
so now once monster has finished moving it will be deleted from the screen.
Now it’s a time for some action our player is sitting ideally since very long time so lets throw some darts.
In order to shoot the darts add below code at the end of the file.
local function onMouseDown(self,event)
local offX = event.x – player:getX()
local offY = event.y – player:getY()
if offX < 0 then
return true
end
local projectile = Bitmap.new(Texture.new(“projectile.png”))
projectile.name = “projectile”
projectile:setAnchorPoint(0.5,0.5)
projectile:setPosition(player:getPosition())
stage:addChild(projectile)
local realX = screenWidth + projectile:getWidth()*0.5
local ratio = offY/offX
local realY = realX*ratio + projectile:getY()
local offRealX = realX – projectile:getX()
local offRealY = realY – projectile:getY()
local length = math.sqrt(offRealX*offRealX+offRealY*offRealY)
local velocity = 480
local duration = length/velocity
projectile.myTween = GTween.new(projectile,duration,{x=realX,y=realY},{dispatchEvents = true})
projectile.myTween:addEventListener(“complete”,
function()
stage:removeChild(projectile)
projectile = nil
end)
end
stage:addEventListener(Event.MOUSE_DOWN,onMouseDown,stage)
whoo hold your breath I know it’s a lot of code so we go through it setp by step
First we had get the position of touch in our function named onMouseDown and if it’s x value is lesser then our players x position we are not allowing to fire the projectile else we instantiate projectile and then fire that according to the position of touch.
Now again we must have to take projectile to out of the screen so we had used some maths and calculated the direction and hence real destination to reach. Same way we also want the speed of our projectile constant so we had also taken velocity as constant 480 over here it means in 1 sec our projectile will move 480 points towards its destination.
Collision Detection: -
Everything is good so far but doesn’t our darts are supposed to kill the monster of course yes for that we need to detect the collision for this paste below code at the end of the file.
function Sprite:collidesWith(Sprite2
local x,y,w,h = self:getBounds(stage)
local x1,y1,w1,h1 = Sprite2:getBounds(stage)
return not ((x > x1+w1) or (x+w < x1) or (y+h < y1) or (y > y1+h1))
end
local function onEnterFrame()
local removableObjs = {}
for i=stage:getNumChildren(),1,-1 do
local sprite1 = stage:getChildAt(i)
if sprite1.name == "monster" then
for j=stage:getNumChildren(),1,-1 do
local sprite2 = stage:getChildAt(j)
if sprite2.name == "projectile" then
if sprite1:collidesWith(sprite2) then
table.insert(removableObjs,sprite1)
table.insert(removableObjs,sprite2)
end
end
end
end
end
for i=#removableObjs,1,-1 do
local sprite = removableObjs[i]
sprite.myTween:setPaused(true)
sprite.myTween = nil
sprite:removeFromParent()
sprite = nil
end
end
stage:addEventListener(Event.ENTER_FRAME,onEnterFrame,stage)
in the above code we had created function to detect the collision between two sprite which is Sprite:collidesWith(Sprite2) and then we are iterating through all objects on the stage and if they are monster and projectile we check whether they collides or not if they collides we simply insert both of them to removableObjs and then we remove them from the stage.
Win or Loose Condition: -
We are setting win or loose condition like if any monster reaches to the left side of the screen player has loosed the game else player has won the game and in both case we give option to restart the game.
First we will see about loose condition if you remember then we had already set the tween on monster which will fire one event when monster reaches the left part of the screen so we had already completed half part for the loose condition now replace following code with the monster’s tween completion function
local duration = math.random(2,4)
monster.myTween = GTween.new(monster,duration,{x = -dx-monster:getWidth()*0.5},{dispatchEvents = true})
monster.myTween:addEventListener(“complete”,
function()
timer:stop()
for i=stage:getNumChildren(),1,-1 do
local sprite = stage:getChildAt(i)
if sprite.name == “monster” or sprite.name == “projectile” then
if sprite.myTween then
sprite.myTween:setPaused(true)
sprite.myTween = nil
end
sprite:removeFromParent()
sprite = nil
end
end
local alertDialog = AlertDialog.new(“Simple Game”, “You loose the game press ok to play again”, “ok”)
local function onComplete(event)
if event.buttonText == “ok” then
timer:reset()
timer:start()
end
end
alertDialog:addEventListener(Event.COMPLETE, onComplete)
alertDialog:show()
–stage:removeChild(monster)
–monster = nil
end)
what we have done over here is when any monster reaches left side of the screen we remove all objects on the screen except our player as we need that for next game without any change and showing alert msg to player to replay the game and on the ok we are starting the game like it was the new one.
Now we need win condition for that first declare
local monsterKilled = 0 just before the onEnterFrame() function and replace the following code in onEnterFrame event
for i=#removableObjs,1,-1 do
local sprite = removableObjs[i]
if sprite.name == “monster” then
monsterKilled = monsterKilled+1
end
sprite.myTween:setPaused(true)
sprite.myTween = nil
sprite:removeFromParent()
sprite = nil
end
now add the following code just after the above code and inside the onEnterFrame event
if monsterKilled == 10 then
monsterKilled = 0
local alertDialog = AlertDialog.new(“Simple Game”, “You won press ok to play again”, “ok”)
local function onComplete(event)
if event.buttonText == “ok” then
for i=stage:getNumChildren(),1,-1 do
local sprite = stage:getChildAt(i)
if sprite.name == “monster” or sprite.name == “projectile” then
if sprite.myTween then
sprite.myTween:setPaused(true)
sprite.myTween = nil
end
sprite:removeFromParent()
sprite = nil
end
end
timer:reset()
timer:start()
end
end
alertDialog:addEventListener(Event.COMPLETE, onComplete)
alertDialog:show()
end
Nothing much over here also we had decalared variable called monsterKilled and initate it with the value of 0 then whenever we remove the monster from the stage we increase its value by 1 and when it reached to 10 we simply display the alert showing you had won
Targeting multiple resolution: -
It is the simplest task of our tutorial as we already have –hd images we can use those images for higher resolution devices To do so right click on the project and set the properties as below make sure you had added -hd images in the project also with same path as normal images.

Now run the project in higher resolution preferably 640×960 as we had added exact double size for our scale however it will work for other high resolutions also. You can also add other set of images which are 1.5 times higher then base resolution to target devices with the resolution of 480×800, 480×854… by adding any suffix and scale value to 1.5
So with this i am finishing this article i will write more article to create the game with GiderosMobile and may be for other game engines also but during that time you can visit http://www.lua.org/docs.html to learn more about lua as well as say hi in the GIderos Forum http://giderosmobile.com/forum/discussions
- Tags: